
| 일 | 월 | 화 | 수 | 목 | 금 | 토 |
|---|---|---|---|---|---|---|
| 1 | 2 | 3 | ||||
| 4 | 5 | 6 | 7 | 8 | 9 | 10 |
| 11 | 12 | 13 | 14 | 15 | 16 | 17 |
| 18 | 19 | 20 | 21 | 22 | 23 | 24 |
| 25 | 26 | 27 | 28 | 29 | 30 | 31 |
- python
- 영상처리
- Windows10
- 딥러닝
- 턱걸이
- 쉘
- linux
- CV
- 백준
- 회귀
- 텐서플로우
- 학습
- OpenCV
- 코딩
- Windows 10
- Computer Vision
- 프로그래밍
- 알고리즘
- 프로세스
- C언어
- TensorFlow
- error
- shell
- 공부
- 백준알고리즘
- 운영체제
- 리눅스
- c
- C++
- 시스템프로그래밍
- Today
- Total
줘이리의 인생적기
visual studio code에서 c++ 개발환경 세팅 본문
https://code.visualstudio.com/download
Download Visual Studio Code - Mac, Linux, Windows
Visual Studio Code is free and available on your favorite platform - Linux, macOS, and Windows. Download Visual Studio Code to experience a redefined code editor, optimized for building and debugging modern web and cloud applications.
code.visualstudio.com
https://sourceforge.net/projects/mingw-w64/files/mingw-w64/
1. 위 두 가지 환경에 맞게 다운로드한다.
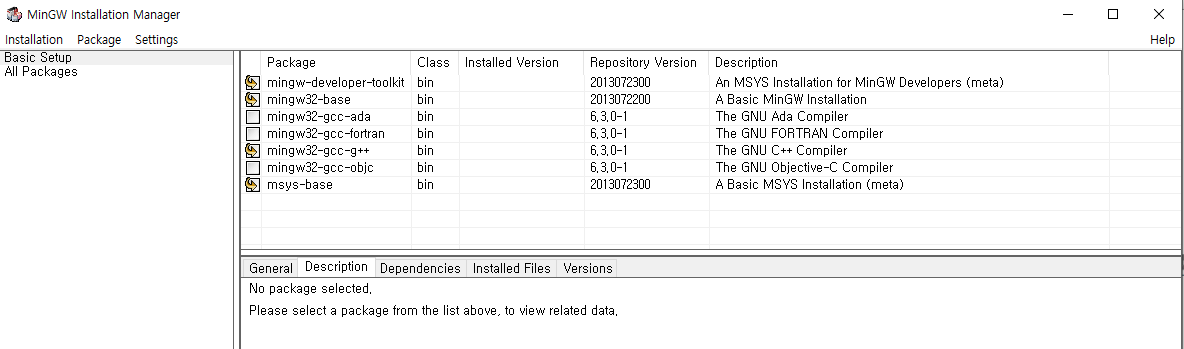
2. 먼저 mingw를 default값으로 다운로드하고, 아래와 같이 4가지를 체크를 한다.
mingw-developer-tookit, mingw32-base, mingw32-gcc-g++, msys-base
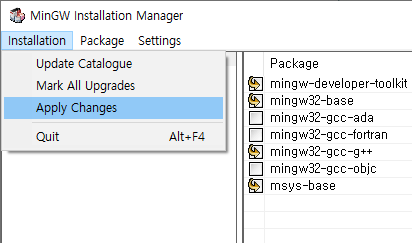
아래와 같이 Installation에서 apply chanes를 누른 후 vscode로.
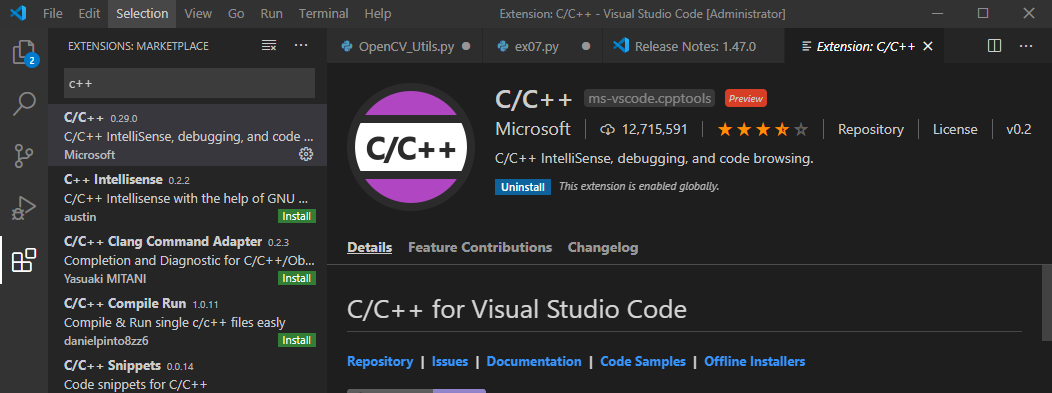
3. vscode에서 ctrl + shift + x를 누르면 확장 탭이 열리는데 c++을 검색해서 install 해준다
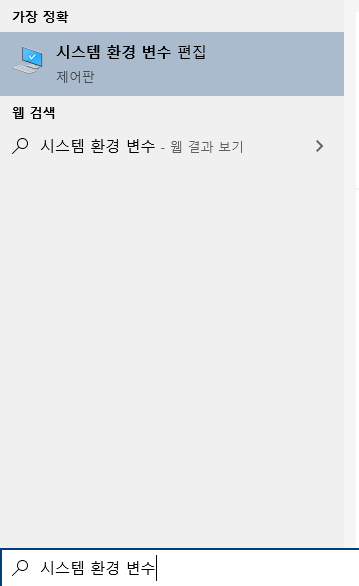
4. 다음은 시스템 환경 변수 설정.
윈도우 버튼을 누르고 '시스템 환경 변수 편집'을 검색.
왼쪽부터 시스템 속성에서 환경변수를 들어가서
시스템 변수의 Path를 찾아 편집을 눌러서
맨 오른쪽 환경변수편집 창을 띄운다.
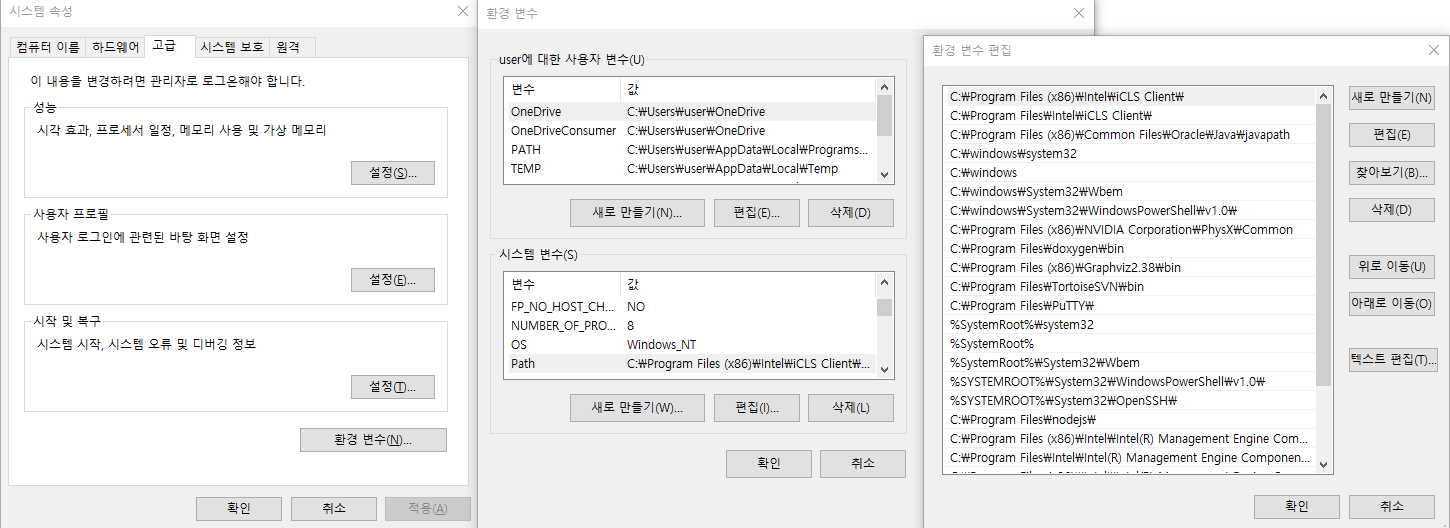
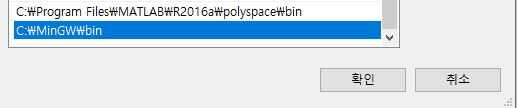
새로만들기를 눌러서 아래와 같이 C:\MinGW\bin을 추가.
5. 이제 vscode로 돌아가서 터미널 - 기본 빌드 작업 구성을 선택.
템플릿에서 tasks.json 파일 만들기 - Others 선택.
tasks.json 파일을 눌러서 아래와 같이 수정.
{
"version": "2.0.0",
"runner": "terminal",
"type": "shell",
"echoCommand": true,
"presentation" : { "reveal": "always" },
"tasks": [
{
"label": "save and compile for C++",
"command": "g++",
"args": [
"${file}",
"-g",
"-o",
"${fileDirname}/${fileBasenameNoExtension}"
],
"group": "build",
"problemMatcher": {
"fileLocation": [
"relative",
"${workspaceRoot}"
],
"pattern": {
"regexp": "^(.*):(\\d+):(\\d+):\\s+(warning error):\\s+(.*)$",
"file": 1,
"line": 2,
"column": 3,
"severity": 4,
"message": 5
}
}
},
{
"label": "save and compile for C",
"command": "gcc",
"args": [
"${file}",
"-g",
"-o",
"${fileDirname}/${fileBasenameNoExtension}"
],
"group": "build",
"problemMatcher": {
"fileLocation": [
"relative",
"${workspaceRoot}"
],
"pattern": {
"regexp": "^(.*):(\\d+):(\\d+):\\s+(warning error):\\s+(.*)$",
"file": 1,
"line": 2,
"column": 3,
"severity": 4,
"message": 5
}
}
},
{
"label": "execute",
"command": "cmd",
"group": "test",
"args": [
"/C",
"${fileDirname}\\${fileBasenameNoExtension}"
]
},
{
"type": "shell",
"label": "g++.exe build active file",
"command": "C:\\minGW\\bin\\g++.exe",
"args": [
"-g",
"${file}",
"-o",
"${fileDirname}\\${fileBasenameNoExtension}.exe"
],
"problemMatcher": [
"$gcc"
],
"group": "build"
}
]
}
위와 같이 파일 수정을 한 후 저장.
6. 다음으로 Ctrl + shift + P 를 눌러 c/c++: 구성 편집(UI) 입력하여 선택
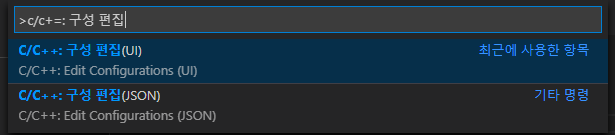
다음 2가지를 아래와 같이 변경.


7. 마지막으로 단축키 설정.
파일 - 기본설정 - 바로가기 키 로 들어가서
오른쪽 종이모양 바로가기 키 열기를 누르고 다음과 같이 입력한다.

8. 이제 파일을 만들고
ctrl + shift + c 로 컴파일
ctrl + shift + r 로 실행하면 끝
'취미 > 잡' 카테고리의 다른 글
| [windows10, pycharm] 주석 단축키 작동하지 않을 때 (0) | 2021.03.25 |
|---|---|
| 아나콘다(anaconda) 설치! (windows) (0) | 2020.11.29 |
| 나단스펜슬(짭플펜슬) 한달 후기 (0) | 2020.07.15 |
| 락토핏 먹기 도전(체중증가 목적) (0) | 2020.07.09 |
| 아이패드 에어 3세대 + 지문방지 필름 + 케이스 + 짭플펜슬 (0) | 2020.05.19 |


